February 7, 2017
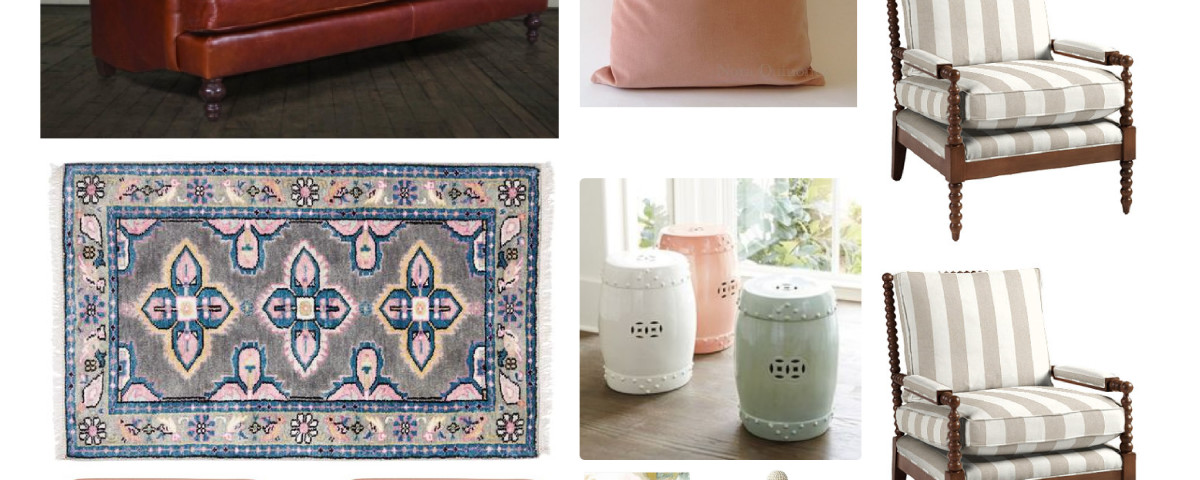
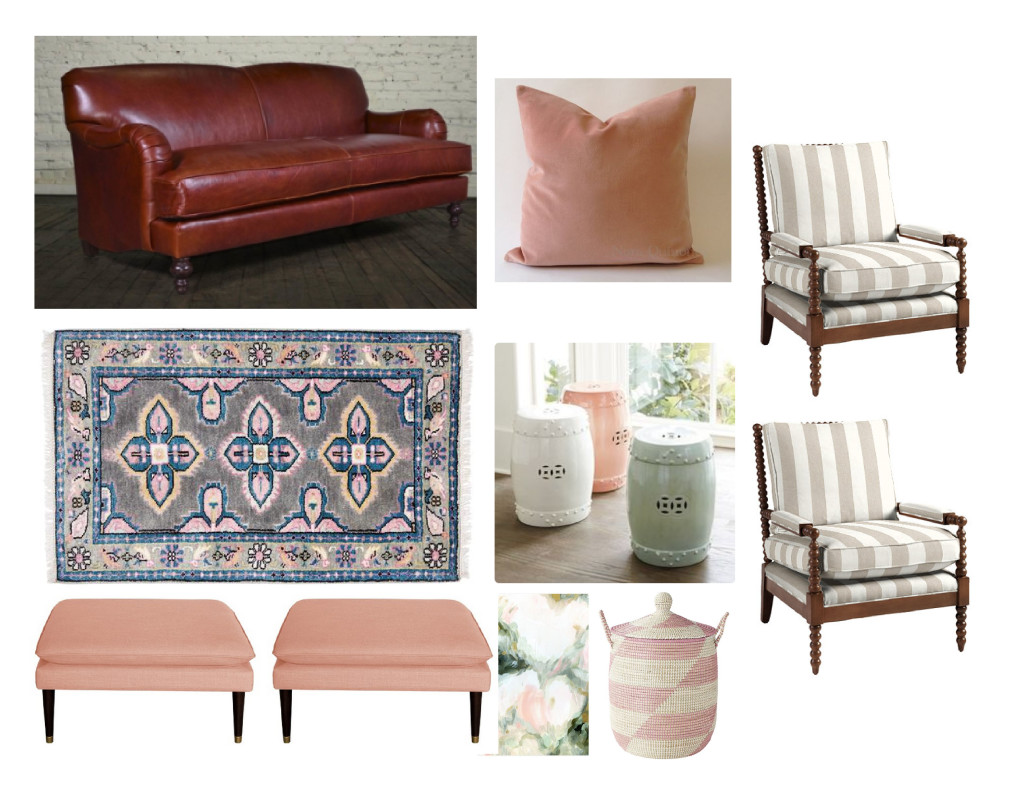
It’s been a while since I’ve done an update on our home… (the last one was here)…. and truthfully, I held out on writing this because I wanted to share photos of our FINISHED kitchen… but, it’s still not 100%. I had hoped to make a roman shade over Christmas and life got in the way, and we still need to do some touch-ups to the island. The Living Room: (current photo, it hasn’t changed since we moved in, except I painted the front door) The problem with becoming an adult is that you want, and care about adult things. Case in point: I made Jeremy return the Apple Watch he bought me for Christmas to put those funds towards this leather sofa. (I decided I couldn’t justify the cost of it vs. how little I would probably wear it – I’m not really a watch wearer anyway). We bought the sofa and loveseat set we currently have on Craigslist almost 9 years ago. I was practically brand new, and it was a nice, neutral tan… but we quickly learned how poor of quality it was (from Rooms to Go) and I outgrew the huge roll-arm style… the only redeeming quality is that it’s super comfortable. I’ve wanted new living room furniture for years, but when we decided to sell our house 2 years ago, we didn’t want to invest in something we weren’t sure would work in a new space, so we waited. We’ve gone sofa shopping multiple times, hemmed and hawed over options, and finally settled on a leather, English arm sofa from Cococo Home. Leather is a must with our dogs and a tight back (no back cushions) are a no brainier. Both dogs like to crawl on top of our current back cushions and they look horrid. Our leather sofa at the beach has held up really well to them, so we feel very confident in this purchase. The spool chairs are a style I’ve loved a long time… their lack of upholstery also appeals to the pet owner in me. The double ottoman instead of a coffee table was kinda Jeremy’s idea… because our living room is long, and we both desire to put our feet up, having two ottomans we can separate makes sense. We can also use them as extra seating if need be. They’re also pink because… I’m deeming this MY space. Jeremy has a whole man-cave out back that will be all plaid, sports, beer, etc. I realize most people would move the chairs to the left side… but that’s the main walkway for us (through our dining room). No one ever uses our front door… there’s no path to it, and you park right by our back door when you visit us. I realize there are also no end tables…. The sofa is pretty set, but I’d love to find all the other elements second hand, although I’m not sacrificing quality… I’ve done that too many times! The wish list: Chairs: Ballard Designs Sofa: Cococo Home (local Cornelius store) in pure molassas Pillow: Etsy Rug: Caitlin Wilson Ottomans (instead of a coffee table): Target Basket: Serena & Lily Garden stool: Ballard Designs Painting: Minted The Hall Bath: If you follow along on Instagram, you’ve seen me ramble about our hall bath. This was a project for down the road, and not really on the horizon…. until we used that bathroom exclusively for almost a year. Apparently the former owners “freshened up” the space with new paint…. but they painted over an old tile backer board product…. that doesn’t take paint well. So over the months of hot showers, the paint began to peel. There’s no redeeming the walls… they’ve got to come out. We got a quote from our contractor to re-tile the floor and tub surround (not all the walls, as it is), replace all the drywall, move the fan to the shower, and reglaze the tub…. and it was INSANE. We are going to reuse the vanity and toilet, they were both new when we moved in. Note that the “before” photo is taken from before we actually moved in… so you don’t see peeling paint! Current vanity: Lowes Floor tile options: Basket-weave or Hexagons

